, , , ,

♥ Ginger Milk Ice Cream 薑汁撞奶雪糕 ♥


Ginger Milk Pudding is one of my absolute favourite chinese desserts. Its silky smooth texture, with creamy milk contrasting the gingery taste is just out of this world. But since summer is here, the pudding seems too hot to be eaten. Ice cream should be a better option?


This is my first attempt at making homemade ice cream. So easy to make and just need handful of ingredients. The custard base is so foolproof.


I enjoyed this homemade ginger milk ice cream a lot, especially when it comes with crushed biscuit crumbs or some chopped nuts would be nice. This ice cream can be kept in the fridge for a week, only if it can last that long!

This post is part of the monthly link up party Our Growing Edge. This event aims to connect food bloggers and inspire us to try new things. This month is hosted by Lindsey at Sneaks & Sweets.


Make 1 pint
1 cup heavy cream
1 cup whole milk
1/2 cup sugar
1 egg yolk
10 slices of ginger
2 tbsp ground ginger
1 tsp vanilla extract

How to make ginger milk ice cream:
  1. In a small saucepan, add heavy cream, milk sugar and egg yolk. Whisk to combine.
  2. Add slices of ginger. Bring the mixture to simmer while stirring constantly with a wooden spoon, for 3 to 4 minutes, or until it is slightly thicken and pale in colour.
    (Which can coat the back of your wooden spoon)
  3. Stir in ground ginger. Let cool to room temperature.
  4. Strain through a fine sieve and add vanilla. Stir well. Place it in your ice cream machine and freeze according to manufacturer's instructions.
With all my love <3

Share:
Read More
, ,

♥ Traffic Light Brownies ♥


Recently, I have received an order to prepare some treats for a baby boy party, with the theme of Lightning McQueen. McQueen is one of the characters in the Disney cartoon "Car". In this case, we decided to make some traffic light brownies to fit the theme, alongside with some cupcakes and roadsign lollies.


For clean cut brownies, you'll need a sharp knife, paper towel and a tall cup of hot water. For every cut, dip the knife in hot water and wipe off using paper towel. This ensures perfect clean cut without a mess to your fudge / cakelike brownies.

This post is part of the monthly link up party Our Growing Edge. This event aims to connect food bloggers and inspire us to try new things. This month is hosted by Lindsey at Sneaks & Sweets.


Make 30 bars
You'll need:
1 favourite brownie recipe / box of brownie mix
Red, yellow and green m&m's chocolate
Semi-sweet chocolate chips

How to make traffic light brownie bars:
  1. Preheat oven to 180C. Spray a 9 x 13'' baking pan with non-stick cooking spray and line it with parchment paper. Set aside.
  2. Prepare brownie as package direction. Pour into prepared baking pan and bake for 30-35 minutes, or until toothpick inserted into centre comes out clean. Let cool completely.
  3. Slice brownie into 3x7cm bars. Pick out the red, yellow and green m&m's chocolate.
  4. Melt chocolate chips in microwave for 30 seconds. Dip each m&m's into melted chocolate and place on brownie bars to assemble traffic light. Repeat with remaining brownies.
With all my love <3

Share:
Read More
, , ,

I Am Featuring With ...

Huge Announcement:

Two of my Biscoff recipes are now featuring Buzzfeed and Huffington Post respectively! 


Thanks a lot to both the host :)

With all my love <3

Share:
Read More
, , , ,

♥ Mini Pavlova ♥


There are some leftover egg whites in my fridge after making my earl grey creme brulee. So this is the best time to make some mini pavlovas for a summer treat with some seasonal fresh fruits.


Whipping a meringue is not difficult but certainly not for a beginner to try out. Aged egg whites are crucial as they have more relaxed protein to trap more air and beat into volume. It is also a must to add some cream of tartar and vinegar just to balance out the pH as aged egg whites release carbon dioxide.


*The outcomes will turn a pale cream colour, if you want perfect white pavlovas, leave the vanilla out.


This post is part of the monthly link up party Our Growing Edge. This event aims to connect food bloggers and inspire us to try new things. This month is hosted by Lindsey at Sneaks & Sweets.

Make 4-5 individual pavlovas
You'll need:
3 aged egg whites
1/8 tsp cream of tartar
1/8 tsp salt
3/4 cup granulated sugar
2 tsp cornstarch
*1 tsp vanilla extract
1 tsp white vinegar

Serving suggestions:
Fresh kiwis
Blackcurrant jam
Vanilla greek yogurt

How to make individual mini pavlovas:
  1. Preheat oven to 110C. Draw 4 circles on parchment paper and turn over on the reverse side, place it on baking sheet.
  2. In a clean, grease-free bowl, beat egg whites until soft peaks. Add salt and cream of tartar. Slowly adding sugar, a tablespoon at a time and continue to beat until stiff and shiny.
  3. Add cornstarch, vanilla and vinegar. Gently fold them into the meringue using a spatula. 
  4. Spread the meringue inside the circles on the parchment paper and smooth the edges. Make a little well in each center.
  5. Bake for 1 hour or until they are dried out. Turn the oven off, leaving oven door slightly ajar and let them sit to cool completely for 2-3 hours. 
  6. Store them in an airtight container in a cool dry place for a few days.
  7. To serve, dollop vanilla greek yogurt, drizzle blackcurrant jam and top off some chopped kiwi.
With all my love <3
Share:
Read More
, ,

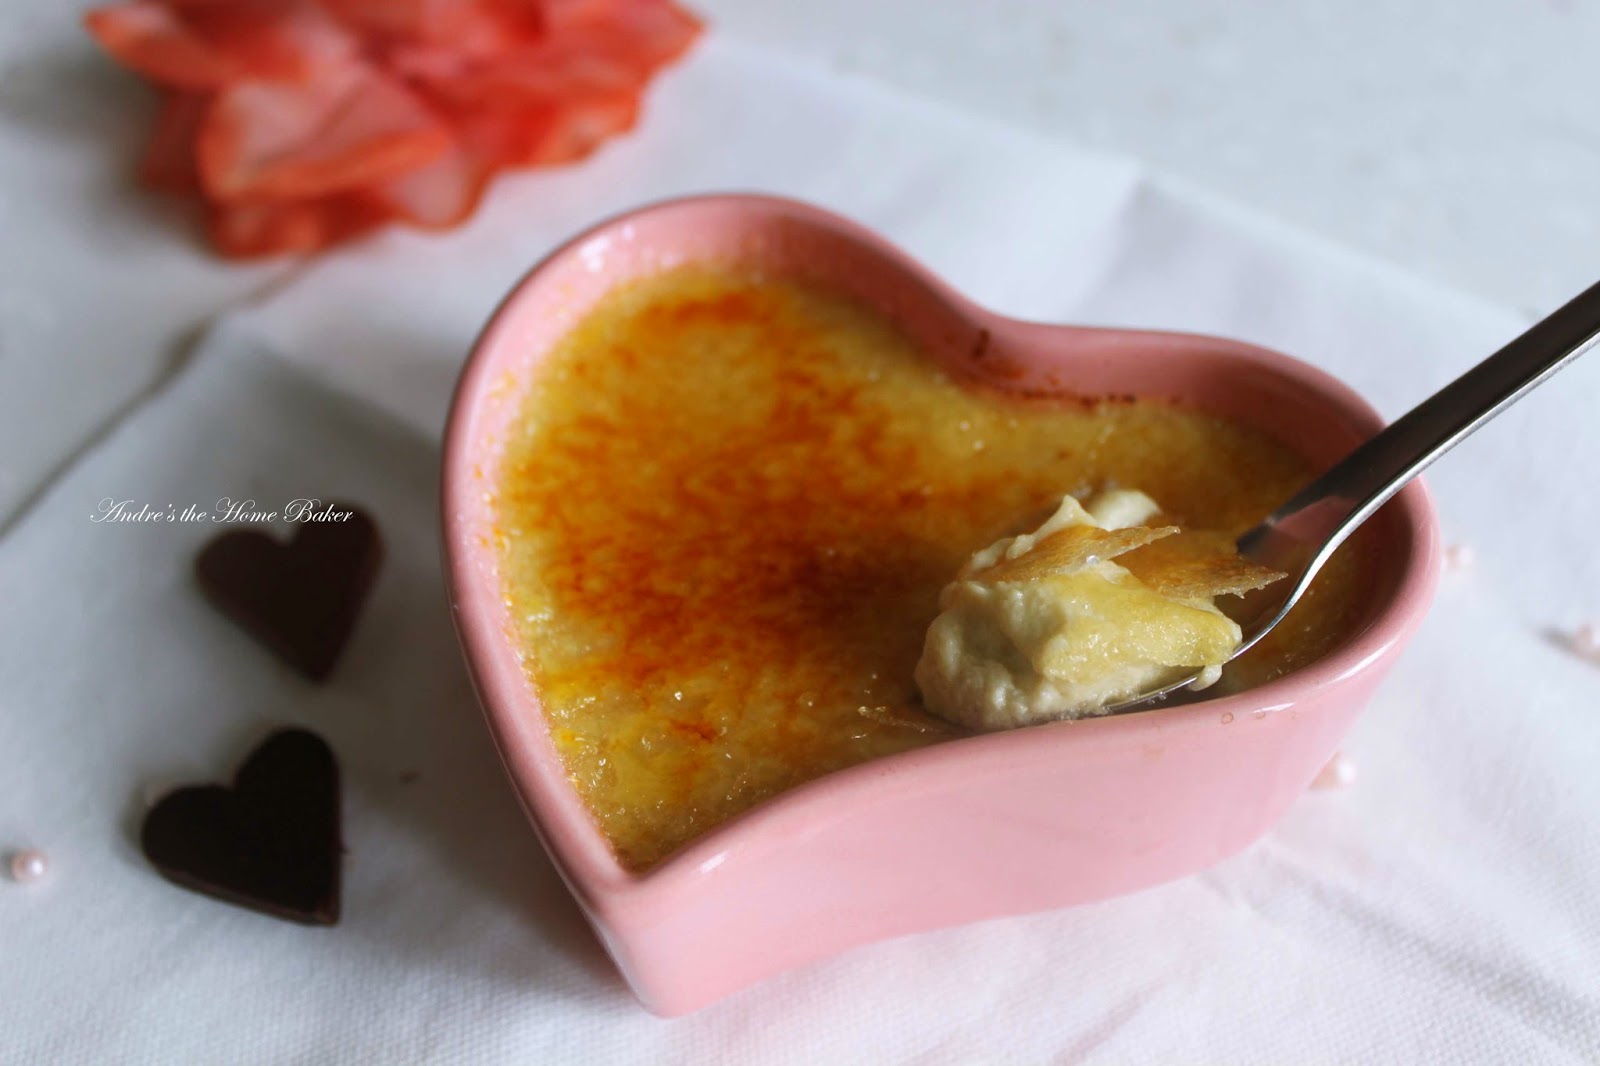
♥ Earl Grey Crème Brûlée ♥


Crème Brûlée, a egg custard pudding with a burnt topping, which is a layer of caramelized sugar. It is always a hit to end an authentic French dinner at bistros or restaurants. They are pretty simple to make with just several egg yolks and cream, or sometimes milk, like mine did. I have also infused Earl Grey tea to the custard which brings not only vanilla, but also a mild aroma of this England tea.


Straining the egg mixture is crucial. But it is still fine to leave some tea leaves in the custard. You may want to use vanilla beans as well for a better vanilla flavor.

This post is part of the monthly link up party Our Growing Edge. This event aims to connect food bloggers and inspire us to try new things. This month is hosted by Lindsey at Sneaks & Sweets.


Make 4 servings
You'll need:
1 cup double cream
1/2 cup whole milk
1 Earl grey tea bag
1 tsp vanilla extract
3 egg yolks
2 tbsp + 2 tsp sugar
1/8 tsp salt
3 tbsp granulated sugar, for topping

How to make Earl grey creme brulee:
  1. Preheat oven to 150C. Prepare hot water.
  2. In a saucepan, combine double cream, milk and drop in the tea bag. Bring to simmer.
  3. In a mixing bowl, whisk egg yolks, sugar and salt.
  4. Fish out the tea bag from the milk mixture and slowly pour the mixture, whisking constantly, into the egg mixture to temper it. Strain the mixture through a fine sieve.
  5. Divide the mixture among ramekins and place them in a roasting pan. Pour enough hot water slowly into the pan until it reaches half way up the ramekins.
    (Avoid splashing into the custards)
  6. Bake for 15-20 minutes or until custards are set and jiggle slightly. Allow to cool completely. Cover and refrigerate.
  7. When serve, remove custards from the fridge. Sprinkle 1 tbsp of the granulated sugar evenly on top of each custard. Using a hand held kitchen torch, caramelize the sugar until golden brown and bubbly. Let sit a few minutes for the sugar to harden. 
With all my love <3

Share:
Read More
, , ,

♥ Banana Chiffon Cake ♥


After all my banana recipes, oatmeal cookies and sugar free muffins, I have a leftover overripe banana being freezed in my freezer, it has darken a lot! So I decided to use it up and add to my foolproof chiffon cake recipe. Still remember my Green Tea Chiffon Cake? Or the Oolong Tea version? They never fail, I promise!


In this version, I used whole milk and added a bit of vanilla extract to make the chiffon cake tastes richer, which compromise well with the banana flavor. And I should credit to my new chiffon cake pan too! Woohoo!


*This time I didn't have enough cake flour in hand, so I made my own: for every cup of all purpose flour, minus two tablespoons of it and add two tablespoons of cornstarch.

Make 7 inch cake
You'll need:
3 egg yolks
85g sugar
3 tbsp oil
4 tbsp whole milk
1 ripen banana, mashed
1/2 tsp vanilla extract
*75g cake flour
1 tsp baking powder
3 egg whites
1/4 tsp cream of tartar

How to make banana chiffon cake:
  1. Preheat oven to 170C. 
  2. In a large bowl, whisk egg yolks and 1/3 of sugar. Add oil, milk, mashed banana and vanilla extract, mix well. 
  3. Sift cake flour and baking powder and add to egg yolk mixture. Whisk until incorporated without lumps.
  4. Using a stand mixer or electric hand mixer, beat egg whites till opaque and foamy. Add remaining sugar and cream of tartar. Beat until stiff peak forms. 
  5. In 3 batches, fold egg whites into egg yolk mixture. Make sure mixture is mixed well in 3 increments.
  6. Pour mixture into ungreased chiffon cake pan. Tab the pan on the countertop to release air bubbles. 
  7. Bake for 30 minutes or until toothpick inserted into centre comes out clean.
  8. Cool the cake upside down on a tall heavy bottle. Leave to cool completely before removing the cake pan. 
  9. Using an offset spatula or sharp knife, run it around the cake. Invert and flip onto serving plate.
With all my love <3
This post is part of the monthly link up party Our Growing Edge. This event aims to connect food bloggers and inspire us to try new things. This month is hosted by Lindsey at Sneaks & Sweets.

This post is also linked to the event, Little Thumbs up organised by Doreen from my little favourite DIY and Bake for Happy Kids, hosted by Diana from Domestic Goddess Wannabe at this post.

Share:
Read More
, , ,

♥ Sugar Free Oatmeal Raisin Cookies ♥


It is challenging to achieve a considerable sweetness when it comes to a sugar free recipe. I have came across recipe using honey, agave nectar, stevia, or maple syrup. But all these are seemingly a "healthier" name for SUGAR. Now fruits are natural sugar. With the addition of spices together with applesauce and raisins, these cookies are still good enough to fulfill a light sweet tooth.


Don't expect them to taste like cookies you'd get at the bakery, but still are soft and chewy, and somehow cakey. I also find golden raisins are sweeter than regular purple ones.

You'll need:
1 cup all purpose flour
1 tsp baking soda
1 tsp ground cinnamon
1/2 tsp ground nutmeg
1 cup applesauce
2 eggs
1 tsp vanilla
1 cup old fashioned rolled oats
1 cup golden raisins
1/2 cup chopped nuts, optional

How to make sugar free oatmeal raisin cookies:
  1. Preheat oven to 180C. Line baking sheet with parchment paper, set aside.
  2. In a medium bowl, combine flour, baking soda, cinnamon and nutmeg.
  3. In a large mixing bowl, add applesauce, eggs, vanilla. Whisk until combined. Add in dry ingredients and stir well.
  4. Using a spatula, fold in rolled oats, golden raisins and chopped nuts, if using. Drop teaspoon of batter onto prepared baking sheet, spacing apart.
  5. Bake in preheated oven for 8-10 minutes. Let sit for 5 minutes before transferring to wire rack to cool completely. 
With all my love <3
Share:
Read More
, , ,

♥ Sugar Free Banana Bread Muffin ♥


Before getting into my sugar free cookie recipe, I decided to make a head start with a sugar free muffins. These banana muffins are moist, spongy and with hint of natural sweetness found from overripe bananas and applesauce, they are like mini banana bread. Perfect for a protein packed breakfast to go!


I love the way how the banana chips on top showcase banana as one of the ingredients in the muffins. However, it is optional and I bet a few walnut can also add some crunchiness to these mini breads. Oh and I tell you, this is a one-bowl recipe, so quick and easy!

Make 12 muffins
You'll need:
3 ripen bananas, mashed
1/2 cup applesauce
1/2 cup oil
1 egg
1 tsp vanilla
2 cups all purpose flour
1 tsp baking soda
1 tsp ground cinnamon
1/2 tsp salt
12 banana chips, for topping

How to make sugar free banana bread applesauce muffins:
  1. Preheat oven to 180C. Line muffin tins with paper liners or grease muffin cases. Set aside.
  2. In a bowl, combine flour, baking soda, cinnamon and salt. Stir well.
  3. In a large mixing bowl, whisk together mashed banana, applesauce, oil, egg and vanilla. Add dry ingredients and stir until well combined.
  4. Divide batter among muffin cases, top each with a banana chips. Bake them in preheated oven for 30-35 minutes, or until toothpick inserted into centre comes out clean.
  5. Let cool and serve warm.
With all my love <3
This post is part of the monthly link up party Our Growing Edge. This event aims to connect food bloggers and inspire us to try new things. This month is hosted by Lindsey at Sneaks & Sweets.

This post is also linked to the event, Little Thumbs up organised by Doreen from my little favourite DIY and Bake for Happy Kids, hosted by Diana from Domestic Goddess Wannabe at this post.

Share:
Read More
, ,

♥ Choux à la Crème (aka Cream Puff) ♥


Choux pastry is a classic french pastry used to make profiteroles, eclairs, or croquembouches. Neither of these I am making today. The combination of choux pastry with a custard-like pastry cream has became my cream puffs instead. They are light, airy and sweetened with a dash of snowy sugar. When refrigerated, that are just another vanilla ice cream puffs. 


These mini puffs can be made ahead of time. The unfilled choux pastry can be kept in air-tight container in the freezer for a month and once defrosted, bake in oven at 180C for 5-7 minutes and fill with your favourite filling, or preferably my pastry cream. Once filled, they should be eaten within 3 days and stored in fridge. Notice that the longer you keep them, they will begin to soften.
This post is part of the monthly link up party Our Growing Edge. This event aims to connect food bloggers and inspire us to try new things. This month is hosted by Lindsey at Sneaks & Sweets.

This post is also linked to the event, Little Thumbs up organised by Doreen from my little favourite DIY and Bake for Happy Kids, hosted by Diana from Domestic Goddess Wannabe at this post.

Make 12
You'll need:

For choux pastry
100ml water
60g unsalted butter
1/4 tsp salt
60g all purpose flour
3 eggs, beaten

For pastry cream
1 1/4 cup full fat whole milk
3 egg yolks
1/4 cup granulated sugar
2 tbsp corn flour / cornstarch
2 tbsp cake flour / AP flour
vanilla extract

100ml heavy cream
1/2 tbsp sugar

Powdered sugar, for dusting

How to make cream puffs:
  1. Preheat oven to 200C. Line a baking sheet with parchment paper. Set aside.
  2. In a large saucepan, bring water and butter to heat until butter is melted. Add salt and cake flour. Stir, using a wooden spoon, until a smooth dough formed. Remove the pot from heat.
  3. Gradually add beaten egg, constantly stirring to incorporate the beaten egg into the dough. When a smooth thick paste is formed, spoon the dough into a pastry bag.
  4. Pipe 12 small mounds of dough onto prepared baking sheet spacing apart. With a damp finger, shape the tops of dough smooth. 
  5. Bake in preheated oven for 30 minutes, then turn the oven temperature down to 180C, and bake for another 10-15 minutes, until puffed up and golden brown. Turn the oven off, poke holes in each puff and leave oven door slightly ajar. Let them sit to cool completely.
How to make pastry cream:
  1. In a medium bowl, mix sugar and egg yolks. Sift in corn flour and cake flour into the egg mixture. Mix until a smooth paste formed.
  2. Meanwhile, heat milk in a saucepan. Remove from heat and slowly add to egg mixture, while constantly whisking the egg to prevent curdling.
  3. Strain mixture through a sieve and return into the saucepan. Over medium heat, bring mixture to boil and whisk mixture constantly until it starts to thicken.
  4. Immediately remove from heat and stir in vanilla extract.
  5. Pour into a clean bowl and cover with plastic wrap touching the surface of custard. Refrigerate until needed.
To assemble choux à la crème:
  1. Whip together heavy cream and sugar until stiff peaks form. Fold into pastry cream.
  2. Slice choux pastry half way through the middle. Transfer pastry cream to a pastry bag. Pipe into the hollow pastry. Dust with powdered sugar and keep refrigerated until ready to serve.
With all my love <3

Share:
Read More